Why elixir for an embedded device?
Elixir treats binary as a data type. Sending a binary stream to a device can be trivial and elegant. Pretend that we have a device that requires 17 bits per message (like a MCP3008 analog input). We can send a start bit, followed by a mode bit, then 3 bits for sensor id, then 12 bits of empty bits, in a very succinct way1:
mode = 0
sensor = 2

<<_::size(14), value::size(10)>> =
  Spi.transfer(pid, <<0x01, mode::size(1), sensor::size(3), 0::size(12)>>)

IO.puts "Sensor #{sensor} measured #{value}"
Note that the message we send is the binary literal:
<<0x01, mode::size(1), sensor::size(3), 0::size(12)>>Neat, right?
Reading and acting on signals from devices also looks like an event-driven design. Elixir/erlang is quite suited for this.
Set up Nerves
Nerves is an elixir project. It packs an application into 12-20MB linux distribution that boots directly to BEAM (Erlang VM). Write your elixir app and include nerves as a dependency. Burn the app onto a SD card and boot it up on a compatible device.
The Nerves “Getting started” guide has a straight-forward installation write-up. I recommend reading it. My MacOS setup boiled down to:
# Update Homebrew & install elixir
❯ brew update
❯ brew install erlang
❯ brew install elixir

# Install libraries used to pack and burn the firmware
❯ brew install fwup squashfs coreutils

# Update Hex & Rebar (for Elixir)
❯ mix local.hex
❯ mix local.rebar

# Install Nerves
❯ mix archive.install https://github.com/nerves-project/archives/raw/master/nerves_bootstrap.ez
Blink the Raspberry Status LED
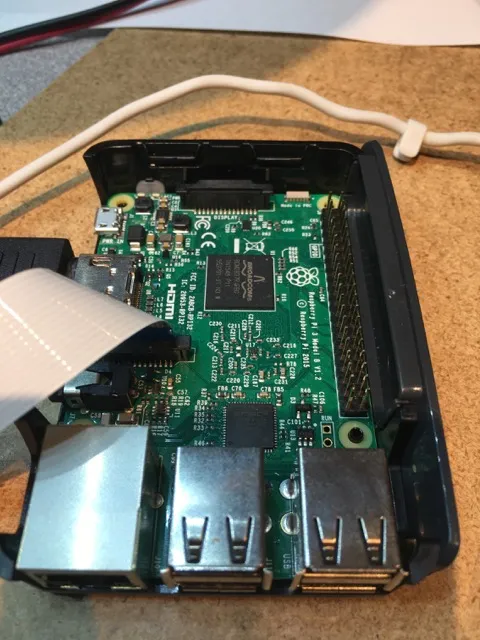
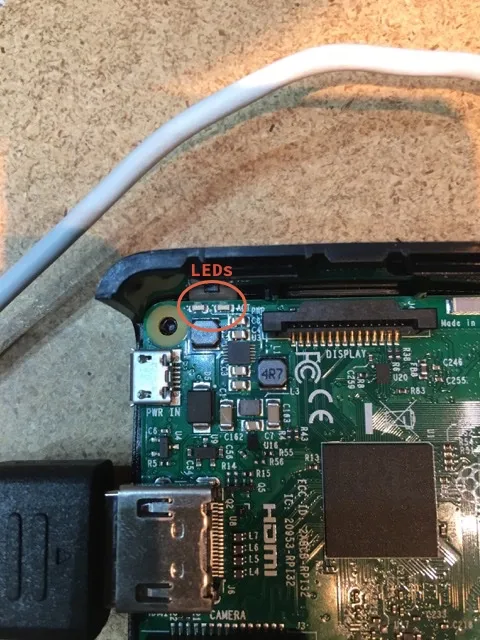
My first “hello world” app with nerves was to blink the status-LED on a Raspberry Pi 3 (RPI).
Set up the project
The first thing I have to do is to generate a scaffold for my project. Nerves includes a mix task for this:
❯ mix nerves.new rpi3-led-blink --target rpi3My target platform is an RPI 3, (rpi3). Switch the --target to whatever your target platform is.
My version of nerves is based on master (the mix archive.install from installation steps), specifically commit c58e1b9. This pull-request adds support for distillery. Distillery is an elixir implementation of release packaging for erlang. I use distillery as a replacement for exrm in my application. Maybe I don’t need mix local.rebar for my setup anymore, but I haven’t tested without it.
Adding distillery to my app is done through mix dependencies, just like any other elixir app dependency:
# in mix.exs

def deps do
  [
    {:nerves, "~> 0.3"},
    {:nerves_leds, "~> 0.7.0"},
    {:distillery, "~> 1.0.0"}
  ]
end
I also add the nerves_leds library as a dependency. It’s how I will blink the LED.
The “heavy lifting”
The main application code is in a file called rpi3_led_blink.ex2:
defmodule Rpi3LedBlink do
  use Application

  @on_duration  500 # ms
  @off_duration 500 # ms

  alias Nerves.Leds
  require Logger

  def start(_type, _args) do
    led_list = Application.get_env(:rpi3_led_blink, :led_list)
    Logger.debug "list of leds to blink is #{inspect led_list}"
    Enum.each(led_list, &start_blink(&1))
    {:ok, self}
  end

  defp start_blink(led_key) do
    Logger.debug "blinking led #{inspect led_key}"
    Leds.set [{
      led_key,
      [
        trigger: "timer",
        delay_off: @off_duration,
        delay_on: @on_duration
      ]
    }]
  end
end
The LED will blink on-and-off every 500ms.
Burning / deployment
To burn the app onto an SD card, I need to download our app’s dependencies, compile the app, create the OTP release and write it to the SD card:
Dependencies
# Download dependencies
❯ mix deps.get
Running dependency resolution
All dependencies up to date
Compilation
❯ mix compile
==> nerves_system
Compiling 14 files (.ex)
Generated nerves_system app
# ... lots of other compile messages
==> nerves
Compiling 5 files (.ex)
Generated nerves app
==> distillery
Compiling 17 files (.ex)
Generated distillery app
==> rpi3_led_blink
Compiling 1 file (.ex)
Generated rpi3_led_blink app
Release
# Define the release (once per project)
❯ mix release.init

# Create the firmware release
❯ mix firmware
==> Assembling release..
==> Building release rpi3_led_blink:0.0.1 using environment dev
==> You have set dev_mode to true, skipping archival phase
==> Release successfully built!
    You can run it in one of the following ways:
      Interactive: _build/rpi3/dev/rel/rpi3_led_blink/bin/rpi3_led_blink console
      Foreground: _build/rpi3/dev/rel/rpi3_led_blink/bin/rpi3_led_blink foreground
      Daemon: _build/rpi3/dev/rel/rpi3_led_blink/bin/rpi3_led_blink start
Updating base firmware image with Erlang release...

# Write the firmware to the SD card
# I have a SD card inserted in my laptop (formatted with ExFAT filesystem)
# Burning the firmware onto the SD will format it also
❯ mix firmware.burn
Use 29.28 GiB memory card found at /dev/rdisk2? [Yn]
100%
Elapsed time: 2.350s
Profit
That’s it! Insert the SD card into the RPI and see what happens. If you have the RPI hooked up to a monitor (via HDMI), then you can see its boot-up along with the elixir/erlang app launch.
Also Logger messages are your friend (for debugging).
App crashes can be written onto the SD card (APPDATA partition), so you can review them on your laptop/desktop. Set ERL_CRASH_DUMP to /root/crash.dump. See the configuration for this app.
The source code for this app is on github.
References
- Another LED blink write-up with Nerves
- Workaround for exrm breakage (which is why I switched to distillery)
Footnotes
-
This code example is taken from Frank Hunleth’s talk from Elixir Conf 2016. ↩
-
This code is basically a replicate of an example from
nerves_leds. ↩